Let’s be real for a second. If you’ve ever searched for “beginner workouts” online, you’ve probably been greeted by a wall of burpees, jumping lunges, and people who look like they’ve never missed a leg day in their lives. That’s not helpful. And honestly, it’s a little discouraging when your body doesn’t cooperate with that high-impact, high-speed template.
But here’s the thing—movement isn’t one-size-fits-all. It never was. Whether you’re recovering from surgery, managing arthritis, dealing with chronic pain, or just noticing that your knees complain a bit more than they used to, inclusive bodyweight workouts for limited mobility are not only possible—they’re genuinely transformative. You don’t need a gym. You don’t need fancy equipment. You just need a little floor space, a sturdy chair, and a willingness to listen to your own body.
Why Bodyweight? Why Now?
Bodyweight training is, at its core, the most democratic form of exercise. It scales down to your reality. You’re not fighting against a barbell or chasing a treadmill’s speed. Instead, you’re working with your own mass—adjusting angles, reducing range of motion, and using gravity as your friend rather than your foe.
For limited mobility, this is huge. Think of it like this: your body is a car, and bodyweight exercises are the tune-up. You don’t need to take the engine apart to feel the difference. Sometimes, just a gentle adjustment to the alignment—a slight shift in how you sit, stand, or reach—can make the whole ride smoother.
That said, the term “limited mobility” covers a lot of ground. It might mean you use a walker. It might mean you can’t get down to the floor easily. It might mean you can stand but not squat. So, the following routines are designed with options—not prescriptive, rigid commands. You’ll see variations for seated, standing, and floor-based work. Pick your lane, and don’t feel bad about modifying further.
Before You Start: The Ground Rules (They’re Gentle, Promise)
First things first—talk to your doctor or physical therapist if you have a specific condition. That’s not me being cautious for the sake of it; it’s just smart. And second, adopt the “traffic light” approach:
- Green light: Movement feels okay, maybe a mild stretch. Go ahead.
- Yellow light: Sharp pain, dizziness, or something feels “off.” Back off, reduce the range, or stop.
- Red light: No-go. Never push through joint pain that’s sharp or sudden.
You’re not being graded. There’s no finish line. The goal is to feel more connected to your body, not to punish it. So, let’s dive into the actual moves—broken down by position so you can mix and match.
Seated Series: The Foundation of Inclusive Bodyweight Workouts
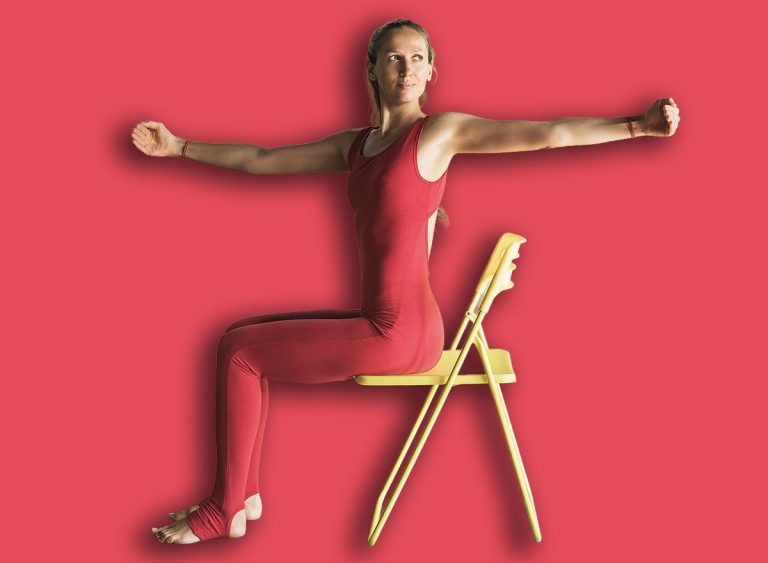
Grab a sturdy chair—no wheels, please. Sit near the edge so your back isn’t leaning against the chair back. Feet flat on the floor, hip-width apart. This is your home base.
1. Seated March (Cardio Without the Impact)
Lift your right knee up as high as comfortable, then lower. Alternate with the left. That’s it. To make it harder, pump your arms like you’re jogging. To make it easier, just tap your toes instead of lifting knees. Do this for 30-60 seconds. You’ll feel your heart rate bump up—sneaky, right?
2. Seated Side Bend (Oblique Awakener)
Reach your right arm overhead and gently lean to the left, feeling a stretch along your right side. Hold for a breath, then switch. This isn’t about touching the floor—it’s about creating space between your ribs and pelvis. Do 8-10 reps per side.
3. Seated Leg Extensions (Quad Builder)
Sit tall. Straighten your right leg out in front of you, flexing your foot. Hold for 2 seconds, then lower. Feel the front of your thigh working? That’s your quadriceps saying hello. Do 10-12 per leg. If your knee clicks, don’t panic—just reduce the height.
Honestly, this seated series alone can be a full workout on a tough day. And that’s okay. Some days, the win is just showing up and moving your joints through their full range—even if that range is a few inches.
Standing (With Support) Workouts: When You Can Bear Weight
If you can stand but need a little help with balance, use a countertop, a sturdy table, or the back of a heavy sofa. Keep your grip light—you’re using it for confidence, not for hanging on like a life raft.
1. Wall Push-Ups (Upper Body Without the Floor)
Stand arm’s length from a wall. Place your palms flat at shoulder height. Bend your elbows and lean your chest toward the wall, keeping your body in a straight line from head to heels. Push back. That’s one. Do 10-15. The closer your feet are to the wall, the easier it is. The farther away, the harder. You control the dial.
2. Supported Squat (To a Chair)
Stand in front of your chair, feet hip-width apart. Hold the counter or a sturdy surface in front of you. Slowly sit back as if you’re lowering into the chair—but don’t actually sit. Stop just above the seat, pause, then stand up. This builds leg strength without the fear of falling. Aim for 8-10 reps. If your hips are tight, that’s fine—just go halfway.
3. Calf Raises (Ankle Stability)
Hold onto your support. Rise up onto your toes as high as you can, then slowly lower your heels to the floor. Do 12-15 reps. This one’s deceptively simple, but it works wonders for balance and ankle strength—two things that often get ignored until they cause problems.
Here’s a pro tip: do these near a window. The natural light and the view make the reps feel less like work and more like a moment of pause. Weird? Maybe. Effective? Absolutely.
Floor-Based Options (For When You’re Down There Anyway)
Getting on the floor can be intimidating. I get it. But if you can manage it safely—or with help—these moves are gold for core strength and hip mobility. Use a yoga mat or a thick towel for cushioning.
1. Glute Bridge (Lying Down)
Lie on your back, knees bent, feet flat on the floor. Place your arms by your sides. Press through your heels and lift your hips toward the ceiling. Squeeze your glutes at the top, then lower with control. Do 10-12 reps. If your lower back complains, keep the lift small—just a few inches off the floor is enough.
2. Dead Bug (Core Without Crunches)
Still on your back. Bring your knees up to a 90-degree angle, shins parallel to the floor. Extend your right arm toward the floor behind your head while simultaneously straightening your left leg toward the floor—but don’t let either touch the ground. Return to start, switch sides. Go slow. This is harder than it looks, trust me. Do 6-8 per side.
3. Child’s Pose (Restorative Stretch)
Kneel on the floor, sit back on your heels, and reach your arms forward. Let your forehead rest on the mat. Breathe deeply for 30-60 seconds. This isn’t a workout move per se—it’s a reset button. Use it between exercises or at the end to calm your nervous system.
Honestly, the floor series might be the most humbling—and the most rewarding. There’s something about moving from the ground up that builds a different kind of confidence.
Building Your Own Routine: A Simple Template
You don’t need a 45-minute block. In fact, shorter is often better when starting out. Here’s a sample flow that takes about 15 minutes:
| Time | Exercise | Sets/Reps |
|---|---|---|
| 0:00-3:00 | Seated March + Side Bends | 2 rounds of 30 sec each |
| 3:00-6:00 | Wall Push-Ups + Supported Squats | 10 reps each, 2 rounds |
| 6:00-9:00 | Seated Leg Extensions + Calf Raises | 12 reps each, 2 rounds |
| 9:00-12:00 | Glute Bridge + Dead Bug | 8 reps each, 2 rounds |
| 12:00-15:00 | Child’s Pose + Deep Breathing | Hold for 2-3 minutes |
Mix and match based on how you feel. Some days, you’ll only do the seated section. Other days, you’ll feel ambitious and add extra wall push-ups. That’s the beauty of inclusive workouts—they’re a conversation, not a command.
Common Roadblocks (And How to Side-Step Them)
You might be thinking, “I’m too stiff for this.” Or “I’ve never been athletic.” Or maybe, “What’s the point if I can’t do it perfectly?”
Here’s the deal: perfection is a myth. The point is to move your joints, get your blood flowing, and remind your muscles that they’re still yours. Stiffness? It often loosens up after a few minutes of gentle movement. No athletic background? Great—you’re not unlearning bad habits